How to Self-Drive The Road to Hana and the Best Stops
The Road to Hana is a must-do when visiting Maui, Hawaii! From black sand beaches to waterfalls, and lava tunnels, this is an epic adventure in Maui. This epic road trip has 620 curves and 59 bridges, most of which are all just one lane. In the Road to Hana guide, I am covering how to self-drive the Road to Hana Highway, travel tips, and the best stops on the Road to Hana Highway you won’t want to miss!
Additionally, you can grab my detailed 5 Days in Maui Itinerary here!
Disclaimer: This post contains affiliate links. I may earn a commission at no cost t you. Disclosure.
TABLE OF CONTENTS
- How to Self-Drive The Road to Hana and the Best Stops
- Road To Hana, Maui Self-Driving Guide
- Rental Cars and The Road to Hana
- Driving Conduct on the Road to Hana
- Food Tips for Road to Hana
- Travel Tips Before Driving the Road to Hana Highway
- Best Stops on the Road to Hana Drive in Maui Hawaii
- The Road to Hana Loop
- Road to Hana, Maui Guide Review
Road To Hana, Maui Self-Driving Guide
Randomly talking to a couple we met in Kauai about Maui, and they recommended we download Shaka Guide – Road to Hana app for our trip.
They said it was so amazing for their trip, and they were not lying. We took their word and downloaded it for our trip.
Once downloaded, the App gives you 3 road options. The Loop, Reverse Loop, and then the classic tour. The App costs around $19.99 each or $29.99 for the bundle, which includes all the tours for the island.
What is great about having this app is that we felt like we were on a tour guide, but it was all based on our time. They told you what was worth seeing and skipping and gave a lot of history through the drive.
Had it not been for the app, we would have most likely missed a bunch of stuff or had no background behind it.
There is also very little service while driving the road to Hana, so the app really helped!
Rental Cars and The Road to Hana
We chose to do the loop route despite what the car rental place told us. We were in an economy car and made it through just fine.
As long as you don’t mind taking the risk of damage to your rental car and the car is not very low to the ground, it should be fine, but this is at your own risk despite my feeling or experience! I am in no way an expert on Rental Car Policies!
With that said, the unpaved road can be a little shady as there are no railings and tiny one-lane bridges, but it was my favorite part through Hana.
You get to see the other side of Mt. Haleakala, which is stunning. You will also get to see some free-range cattle, which is also pretty cool.
Find rental cars in Maui with Discover Cars.
Driving Conduct on the Road to Hana
Since the Road to Hana Highway is mainly one lane, there is some road of conduct rules to familiarize yourself with. This includes:
- Do not park along the Hana Highway in spaces that are not designated parking.
- Pull over for local traffic so they don’t get held up.
- Use restrooms at State parks and County parks – not the roadside or forest.
- Don’t walk on the Hana Highway. Visit sites and attractions with permitted, legal and safe parking only.
- Do not enter streams on occasions of heavy rains and flash flooding conditions.
- Avoid Hana Highway when it is raining to avoid potential landslides.
Furthermore, always stay up-to-date with any lane closures which sometimes happen due to fallen trees, road repair, and weather.
Food Tips for Road to Hana
One thing the app suggests from the beginning is for you to stop in Paia at the Hana Picnic Lunch Company for picnic food. It is a great idea in theory, but I would recommend just getting smoothies and bringing some snacks from wherever you get gas for the trip.
There are so many good places to get food along the way, so it’s not worth bringing the picnic lunch. For example, there is the famous Aunty Sandy’s, which was out of this world banana bread that comes piping hot, or Coconut Glen’s Homemade Dairy-free ice cream, YUM. Glen lets you taste before you buy, and they are all so amazing!

Travel Tips Before Driving the Road to Hana Highway
I briefly want to discuss some travel tips to know before you drive the Road to Hana.
One of the biggest tips is looking into reservations. As the Road to Hana has gained popularity, the park services have added reservations to popular spots. One of which is the famous black sand beach (Wai anapanapa State Park). You can make your reservation here.
If you get car sick easily, make sure to bring some remedies with you. You are essentially going up a mountain with a lot of hairpin turns.
Additionally, there is no cell phone service on the Road to Hana. This is why I think having the app is great if you self-drive.
Best Stops on the Road to Hana Drive in Maui Hawaii
For this Road to Hana guide, starting early is key when self-driving The Road to Hana. If you can, try to get to Paia Town by 7 AM.
This is also where you should fill up your gas! It’s a long day with a lot to see, so you won’t want to cut yourself short. Check my packing list before you go!
The Road to Hana officially starts in Kahului and ends in Kipahulu (Haleakala National Park) if you decide to do the classic route (driving there and back).
Baldwin Beach Park or Ho’okipa Beach Park (Optional)
I am marking both these beaches as optional since it is still so early in the morning. If you do the classic route, you may consider stopping at one of these beaches on the way back.
Baldwin Beach Park is a public beach located just outside of Paia. Ho’ okipa Beach Park is located at Mile #9 on Hâna Highway (36) and is considered a mecca for surfers.
Twin Falls Mile Marker 2
Ready for your first waterfall while driving the Road to Hana in Maui? You will see the parking lot on your left, but if there is no parking, you can find some a little further up the road.
The only bad part is that many signs say, “5 Cars were broken into this week that were not in the lot”.
Because we didn’t park in the lot, we figured we would run in, check it out, and go back to the car.
We found one waterfall as we quickly walked in, I just don’t think it was Twins Falls.
If you can park in the lot, Twins Falls are supposed to be one that you can actually swim in.
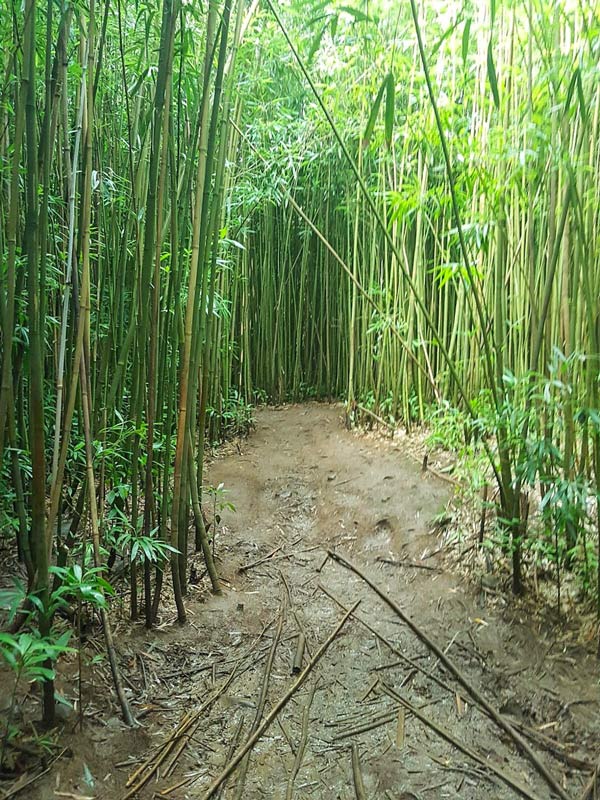
Bamboo Forest
Update: Has been “officially” Closed
While the Bamboo Forest is now controlled by private property, it is considered closed. Many are still hiking the trail, but the decision to close the trail off was due to the amounts of injuries. The Path is somewhat difficult to find, very slippery, and muddy.
This was not the case during our visit, so enter at your own risk.
There are several places to enter through, although the one we chose was not necessarily the best.
There were so many cars stopped here, so we had to park further up the road and just followed a couple in.
Where we entered, the path was narrow and on the edge of a stream. I would recommend holding several bamboo stalks while walking through in case one snaps. Our exit spot was much easier, so not all paths were difficult.
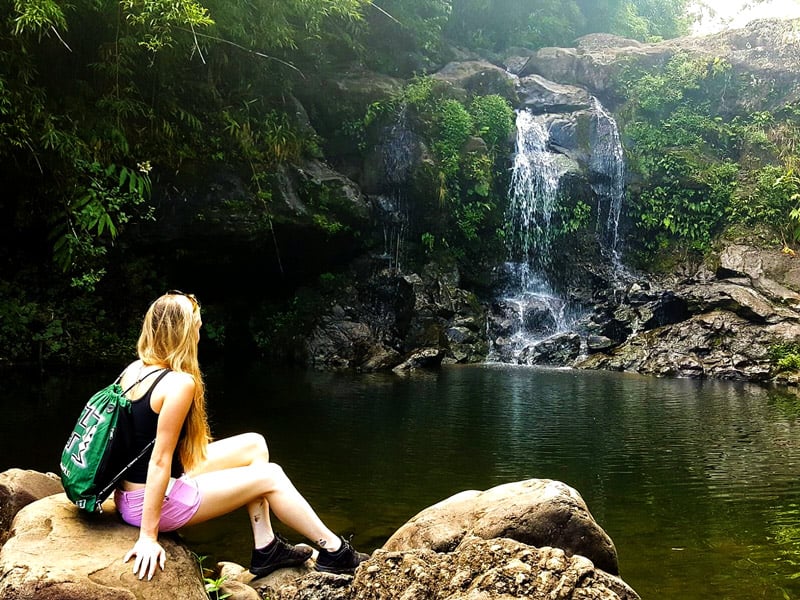
Through the dense bamboo forest, we made our way to a stream with a peaceful waterfall. We spent about 30-45 minutes here.
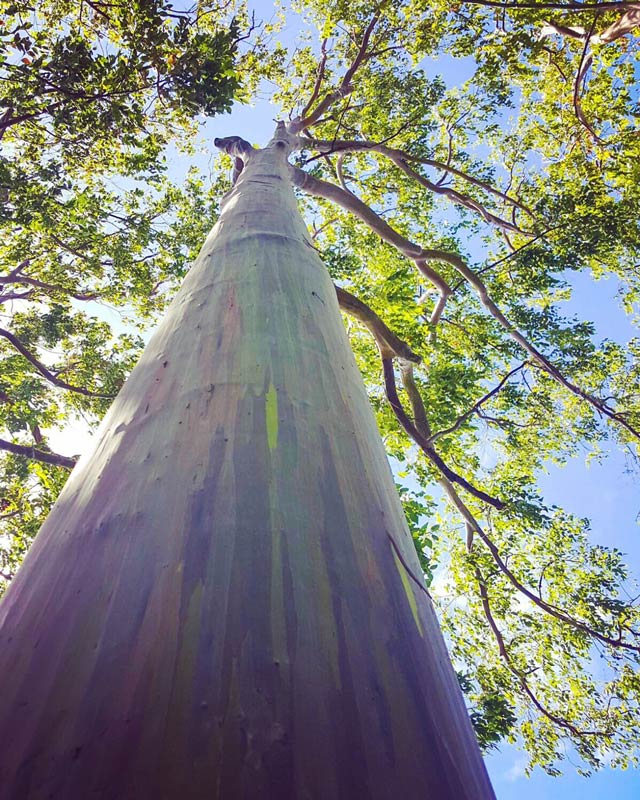
Painted Tree’s
The Painted trees will be on your left-hand side. For parking, you should be able to pull over a little way up the road on the right-hand side. You will see a small section of the beautiful Eucalyptus trees, also known as the painted trees.
These rainbow Eucalyptus trees get their name from the colorful bark that looks to have been painted. (makes sense!) These trees are actually indigenous to Australia, but, I was so happy I got to see them here in Maui, Hawaii!

Kaumahina State Wayside
You have probably been driving for a while now and may be in need of a restroom. The Kaumahina State Wayside has restrooms and a nice viewpoint.
The Shaka guide app will let you know this is a short detour, but it’s definitely worth it! This is where you can get Aunty Sandy’s Banana bread which is famous in Maui, and see some beautiful views of a lava cost.

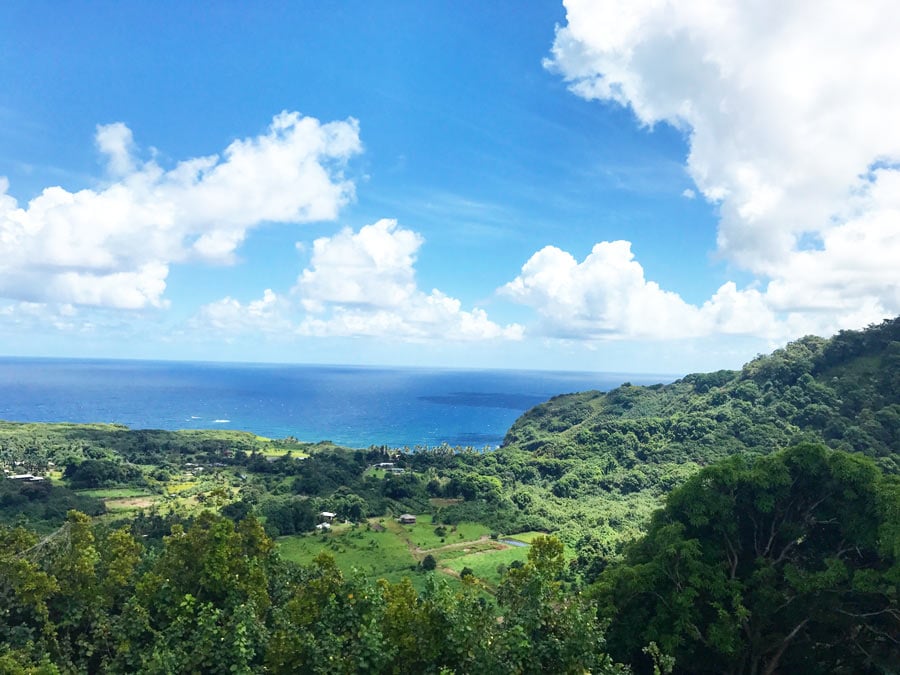
Wailua Valley State Wayside Park
We stopped at Wailua Valley State Wayside Park shortly to view panoramic views of the lush jungle and the ocean. It’s a quick and beautiful picture.
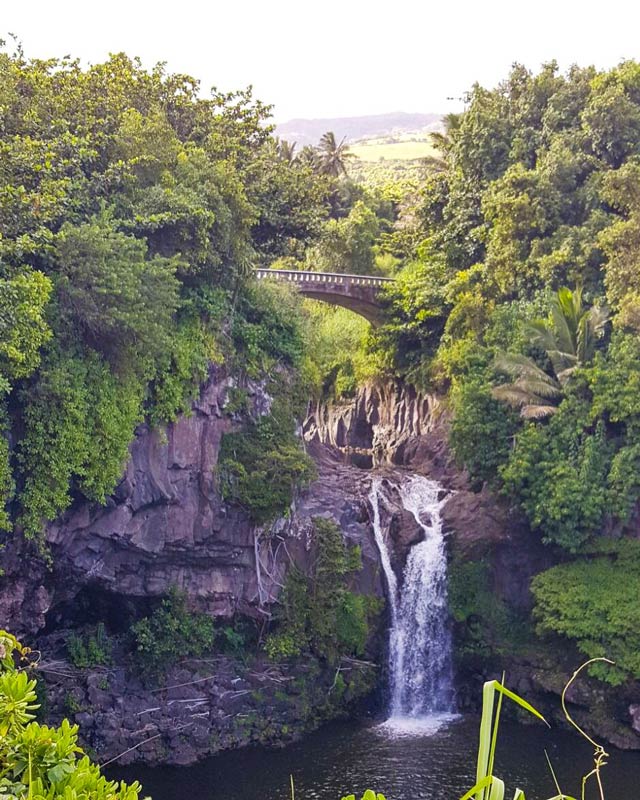
3 Bear Waterfalls (Upper Waikani Falls)
Ready to chase waterfalls? On the road to Hana, you will see more waterfalls than you can count, one more beautiful than the next. 3 Bear Falls was one of my favorites to see in Maui.
We saw people swimming at these falls, but it seemed difficult to get down to. Throughout this trip, you want to stay aware of the time since this is not the road you want to go down in the dark.

Wailua iki Falls
You will notice that most of the land has no trespassing signs, however, everyone is trespassing. Since we saw everyone doing it, we figured how bad could it be. Of course, this is all at your own risk.
These falls are a bit of a hike, but it’s a nice place to stretch your legs. We only walked to the first falls, but if you go further, there is supposed to be another nice waterfall.
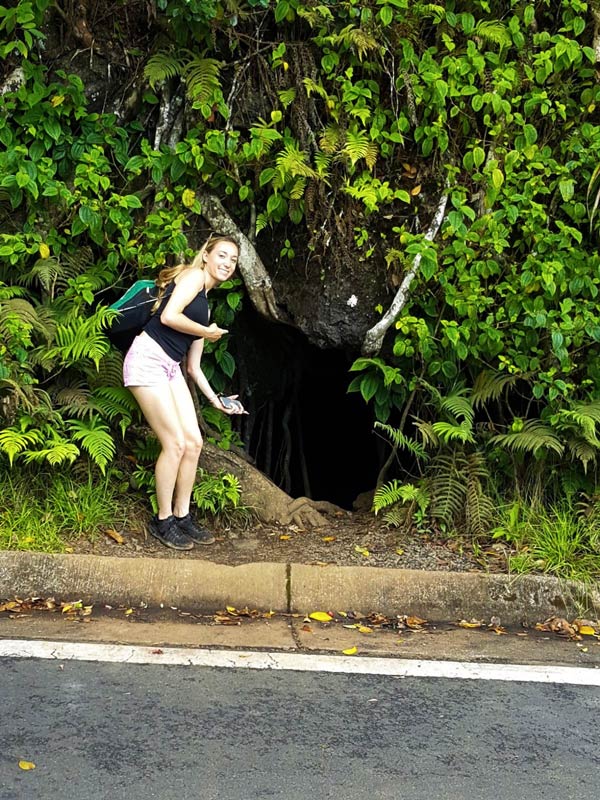
Road to Hana Lava Tube
This is a small lava tunnel on the side of the road that you can easily drive past and not even see. I know there are much larger lava caves that you pay to go into, but being that we are on a budget, we didn’t entertain them.
Make sure you bring your phone as it is pitch black but super cool.
Towards the end of the tunnel are a bunch of tree branches coming down. We climbed out and were able to go around to the car. I thought this was really awesome and was no more than 10 minutes.
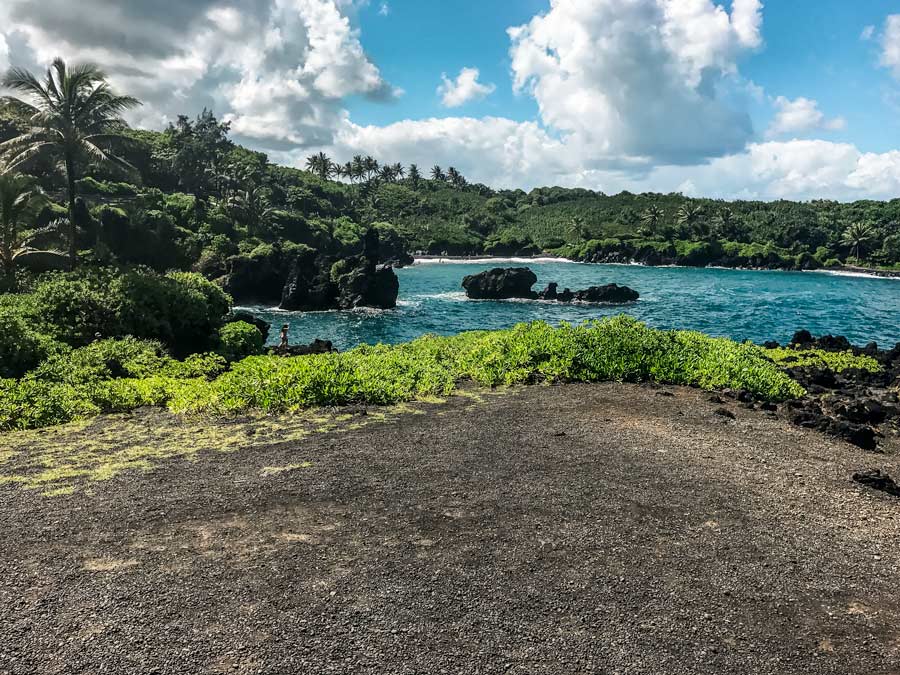
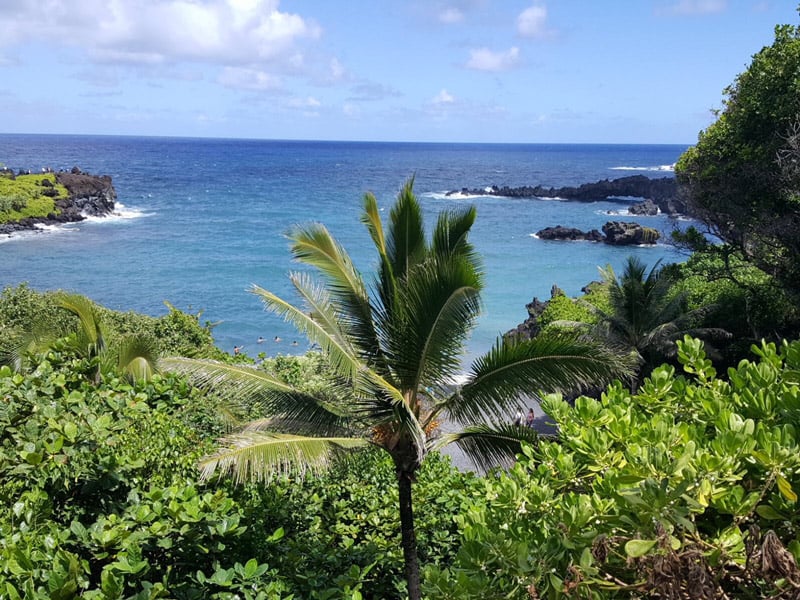
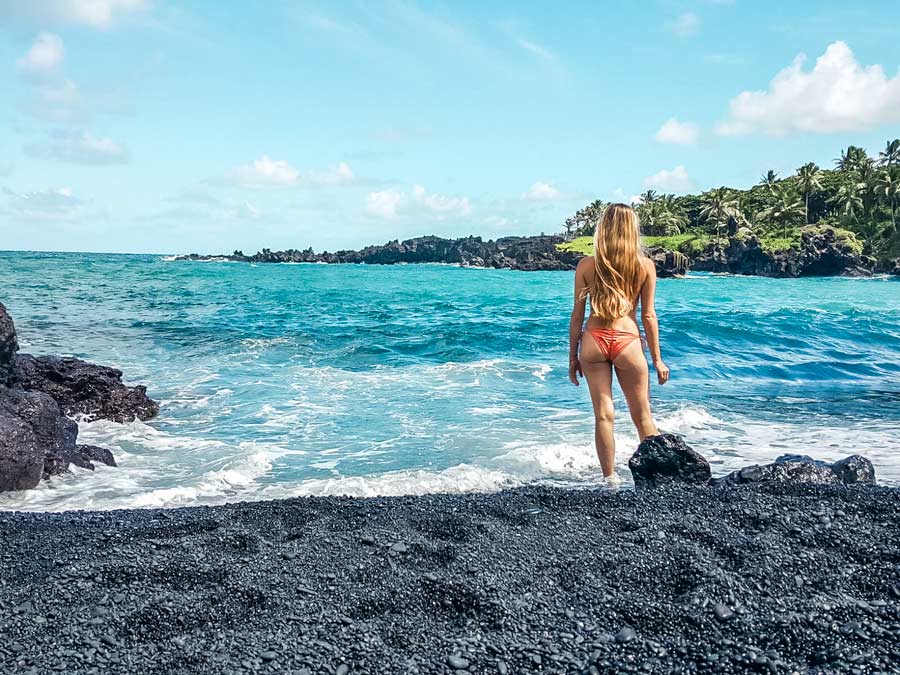
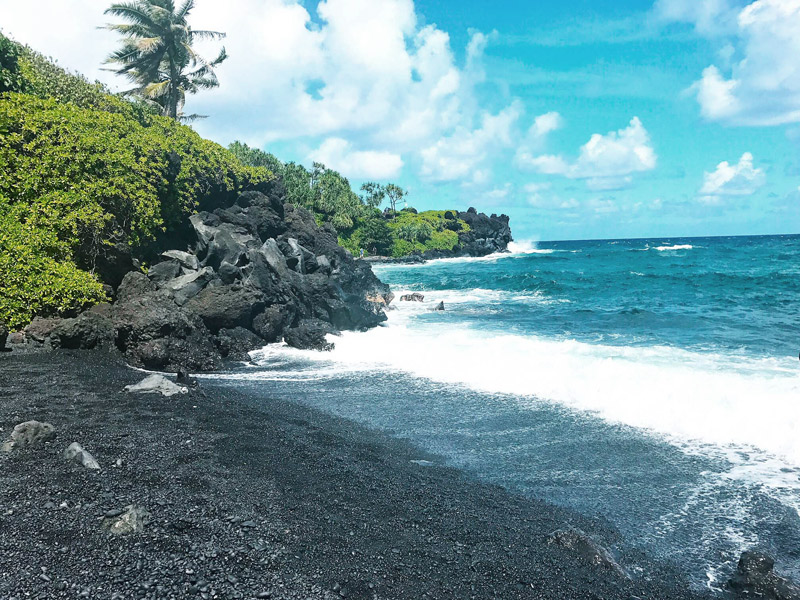
Waianapanapa Black Sand Beach
After countless Instagram pics of this Maui beach, it was on my top list of things to see. The park is huge, but the beach itself is rather small. Regardless of the size, it is absolutely beautiful.
I expected the beach sand to feel like “real” sand, but it was more like a bunch of black pebbles. The sand is actually lava all broken down, so it makes sense, but I didn’t know that until we got there.
We saw a sea turtle, a couple of mongooses, explored a lava cave, and more. This is a place you want to spend some time exploring, relaxing and eating some snacks like that delicious bread from Aunty Sandy’s.
All non-Hawaii resident visitors to Waianapanapa State Park are now required to purchase both Entrance and Parking Reservations. Children 3 years old and younger are free.
I’d recommend purchasing the reservations in advance. Find tickets here.
Town of Hana, Maui
We finally made it to Hana town. This is a charming little town, and I would definitely recommend grabbing a bite here, although I didn’t get to myself due to the whole Paia sandwich thing. All the stands and food did look really good and fresh!
Fish Pond
The Fish Pond stop seems to be more of a local place, but we saw a red sand beach here, which was pretty awesome. You can also see Alau Island here. I will leave it up to the Shaka guide to give you the inside scoop on this spot!
I would just say, to be very respectful since it does not seem like a normal tourist area.
Haleakala National Park
You have now reached the end if you choose the classic route. To go into the park, you must pay $25 per private vehicle (credit/debit card only), valid for 3 days.
I would plan your Haleakala sunrise within these same 3 days this way, you don’t have to pay twice. I share a separate post about attending the Haleakala sunrise, which is something you do not want to miss in Maui!
On this side of Haleakala National park, you can walk down the Pipiwai Trail, explore the seven sacred pools and take in the views of the ocean. People use to swim here, however, the pools were closed indefinitely, and there were shark signs saying not to go in as well.

The Road to Hana Loop
If you decide to do the classic route, you might want to go to some places you skipped on the way there, but if you are like us and choose the loop, here are some extra places to stop on for your Road to Hana guide.
When driving the unpaved road, please make sure you respect the locals by not going through their property and letting them go around you on the road.
Also, just FYI, make sure you are a very comfortable driver because there are some very tight 1 lane spots that are just slightly sketchy.
Waioka Pond (Venus Pool)
As mentioned on the Shaka Guide app, Venus Pool is a popular stop. However, it is private to visit. We pulled off and followed the path with some locals, and it indeed feels very much like a local spot with very few tourists.
When we got back to the car, we had a nice ticket waiting for us. So, I am not sure I would recommend this spot, but I know many other guides mention it.
Wailua Falls
This 80 ft waterfall is another great spot to add to your Road to Hana bucket list since it is basically right off the road. Plus, this is considered a swimmable waterfall.
Charles Lindbergh’s Grave
We went here, but I would skip it unless you have a lot of time left. There was a nice Banyan tree, but that was about it.
South Side Views of Mt. Haleakala
The rest of your journey is mainly taking in the landscape, with a couple of optional stops along the way. First, I want to start by saying how breathtaking the south side of Mt Haleakala is (my pictures do not do it any justice!)
We saw a bunch of free-range cattle just walking along the road and plenty of panoramic views of the rough seas and landscapes. Throughout the drive, the app points out different areas and gives you some history while driving.

Smooth Rock Beach
We pulled off to the right side of the road, and ran down to check out the smooth rock beach. We were greeted with stacks of smooth rocks, crashing waves, and gusting winds.
A unique thing about this beach is when the waves crash, the rocks would bang against each other to make beautiful music.

Road to Hana, Maui Guide Review
Our travel guide through the Road to Hana took about 7 hours, and boy were we beat when we got back to the hotel. Overall, it was such an amazing experience to see the lush jungles on one side of Mt Haleakala to the lesser-seen dry side of the mountain.
Maui Hotel Recommendations:
- Sheraton Maui Resort at Black Rock (We stayed for our honeymoon & loved it)
- Westin Maui Resort & Spa
- Hyatt Regency Resort & Spa
Besides the Road to Hana, you should also make sure to experience the sunrise atop Mt. Haleakala. If you enjoy looking for photogenic spots, you can also check out these Maui Instagram spots!
Other Hawaii Travel Guides:
Have any questions about these best spots on the Road to Hana self-driving guide? Let me know in the comments below!
Think driving might be too much for you? There are tons of Road to Hana tour guides that can take you.
Love this Best Stops on the Road to Hana Travel Guide? I’d appreciate it if you could share it below!

I have heard such good things about Road to Hana. Unfortunately I don’t drive so I guess I have to visit with someone that does!
This looks like such a beautiful area to go on a road trip through! Thanks for all of the great tips.
Such a great guide! And that black sand beach is definitely on my bucket list. Thanks for sharing!
Gorgeous! I feel like you could spend another full day on all these pit stops. Saving this for when we’re up there!
Some amazing places to see! Definitely adding them to the list!