8 Easy Steps to Start A Travel Blog Now!
Blogging and designing my website has become one of my favorite things to do, but it has not always been that way. When I started my travel blog, I had absolutely no idea what I was doing. With no prior skills, it took me countless videos and searching the web before I could figure out how to even get a website online. After all the struggles I went through, I wanted to make a simple guide on how to start a travel blog, or really any type of blog.
Below, I will go through 8 easy steps to start your travel blog or any other type of blog because the steps are all the same! As a bonus, I will share some of my favorite plug-ins that make the magic happen when designing and optimizing your travel blog, SEO tips, and social media tips!

Disclaimer: Please note this post contains affiliate links for which I receive a small commission at no cost to you.
TABLE OF CONTENTS
- 8 Easy Steps to Start A Travel Blog Now!
- Why You Should Start A Blog
- How to Start A Travel Blog
- Step 1: Start An Account With Bluehost
- Step 2: Choose Your Blog Domain
- Step 3: Payment and Account Info
- Step 4: Choose a Package For Your Blog
- Step 5: Get logged Into Your Account
- Step 6: Select Blog Theme
- Step 7: Start Designing Your New Blog
- Step 8: Bonus Blog Plug-ins
- The Course that Helped Grow My Travel Blog
- SEO Tools
- Start Getting Traffic Quick to Your Travel Blog
- Still Feel Overwhelmed Starting a Travel Blog
- How To Start a Travel Blog Wrap-up
Why You Should Start A Blog
Before we deep dive, let’s talk about why you should start a blog! If you feel passionate about a certain topic and want to share your knowledge, a blog is a great way to share.
Blogging also opens up the opportunity to make a side-hustle or even a new full-time job. Yup, that’s right, tons of people are monetizing their blogs!
If you are already an influencer on social media, you absolutely need a blog. If your main platform is Instagram or any other social media platform for that matter, you would be making a mistake in not having a more direct way to communicate with your community.
For example, if Instagram’s algorithm changed tomorrow, or one day your platform is not popular, what would you do? How would you connect to your community if they decided to delete every account?
By starting a blog, you have complete control over your website. Your reach is unlimited and through email, you will always have a direct line to your community! In this day and age, having an email list can be one of your biggest assets.
How to Start A Travel Blog
To get started, you need a hosting site and WordPress.org. I’ve been hosting with Bluehost hosting service for over 3+ years. I’ve had a great experience with them and have found their customer service is also extremely helpful (I’ve called several times)!
I’ve only just recently upgraded my hosting service since my traffic is over 25K a month with Big Scoots Hosting for a dedicated server as opposed to a shared server.
Without getting very technical, basically, your hosting site is where your domain name lives and makes your website live on the internet. WordPress.org (free) is where you get to actually design your site. To reiterate, you will need both.
I have even teamed up with Bluehost to offer you a special rate here.
Step 1: Start An Account With Bluehost
As I mentioned before, you will need to host your website. I use Bluehost’s basic package. I’ve found this package works great for everything I am currently doing. Start with Bluehost here!
Step 2: Choose Your Blog Domain
If you already have an established name on social media, first see if your desired blog domain name is available. BTW: your domain name is your www.domainname(.)com.
Unfortunately for me, I waited a little too long and my social media name Findlovetravel(.)com was taken (facepalm). This is why my domain is Findloveandtravel.com. Don’t wait like me!
If you are just starting out, make sure the name is available across all channels (Facebook, Twitter, Instagram), so you can stay consistent!
While you would never really want to do this, you can change your URL name later, which is also something I did (Double facepalm). Thankfully, Bluehost figured it out all for me!

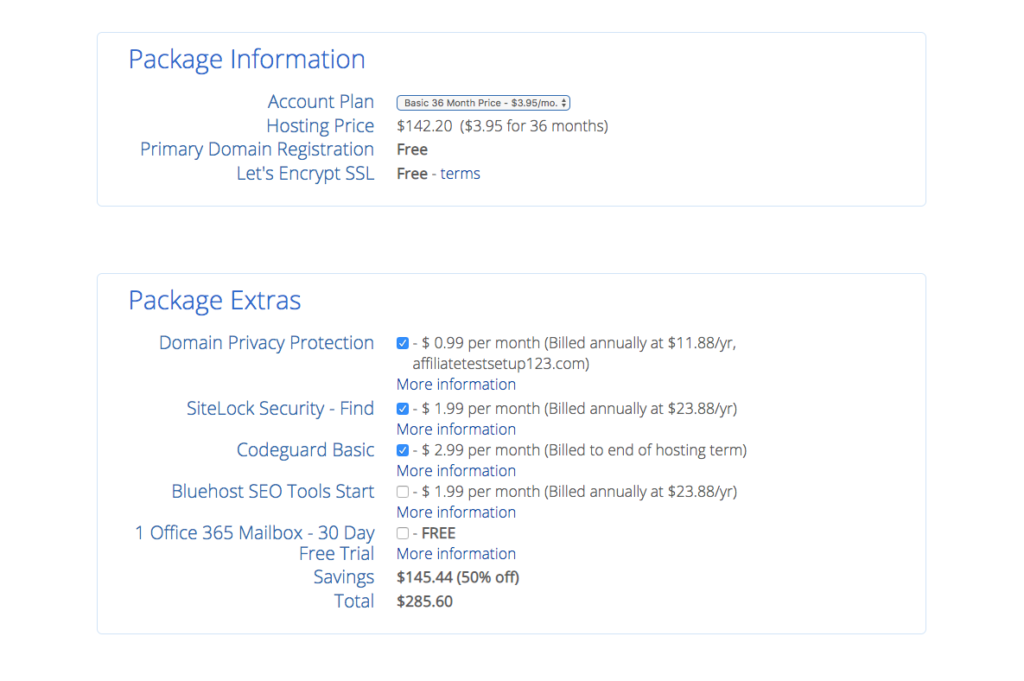
Step 3: Payment and Account Info
Now that you have walked through the first steps with Bluehost, you have your domain name! You are just a couple of steps away from making your blog live! The next step is to enter your payment and account information.
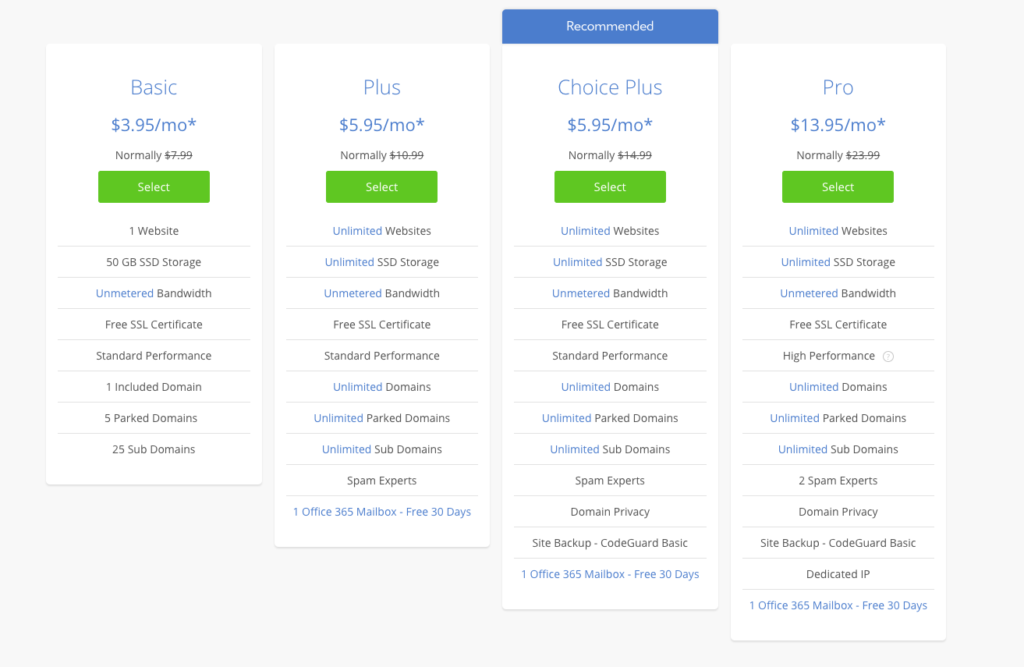
Step 4: Choose a Package For Your Blog
Next, it’s time to choose your package. If you can, I would recommend the 36 months, since you get larger savings and it will motivate you to be committed to your new blog. For add-ons, I personally have domain privacy protection and SiteLock Security.
Step 5: Get logged Into Your Account
Congratulations! Your domain has been set up! Now it’s time to create your user name and password so you can officially log in!
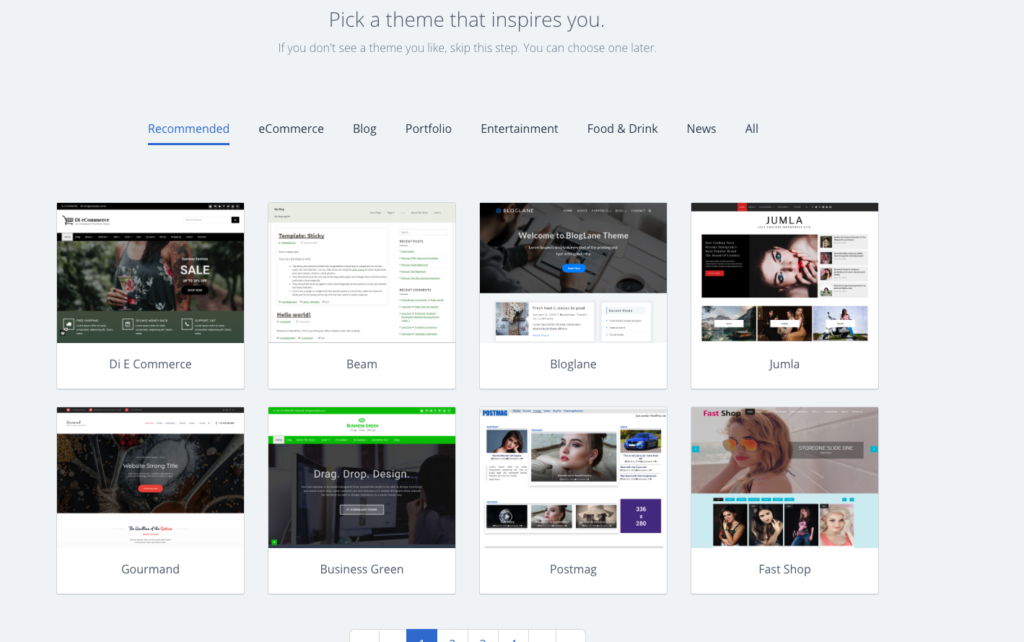
Step 6: Select Blog Theme
Things are getting exciting! It’s now time to choose the look and feel of your website. You can select a theme from Bluehost, WordPress, or Generate Press (where my theme is from). Generate Press offers free themes, but it is worth getting the paid version – I promise!
Generate Press is known as one of the fastest themes and works well with many plugins. I also think they have fantastic customer service. You can always change your theme later, but it is usually best to get started with a theme that integrates easily with plug-ins.
Step 7: Start Designing Your New Blog
Once your theme is uploaded, you are ready to go. The theme will give you directions on how to upload it. Make sure you are signed into your Bluehost account.
From the homepage, you can log into your WordPress Account.
Please make sure it is the WordPress.Org site and NOT the WordPress.com!
This is important because only WordPress.org will allow you to do all the customizing you need along with adding plug-ins; etc! Now, just write a post or make a page and make your website live right away!

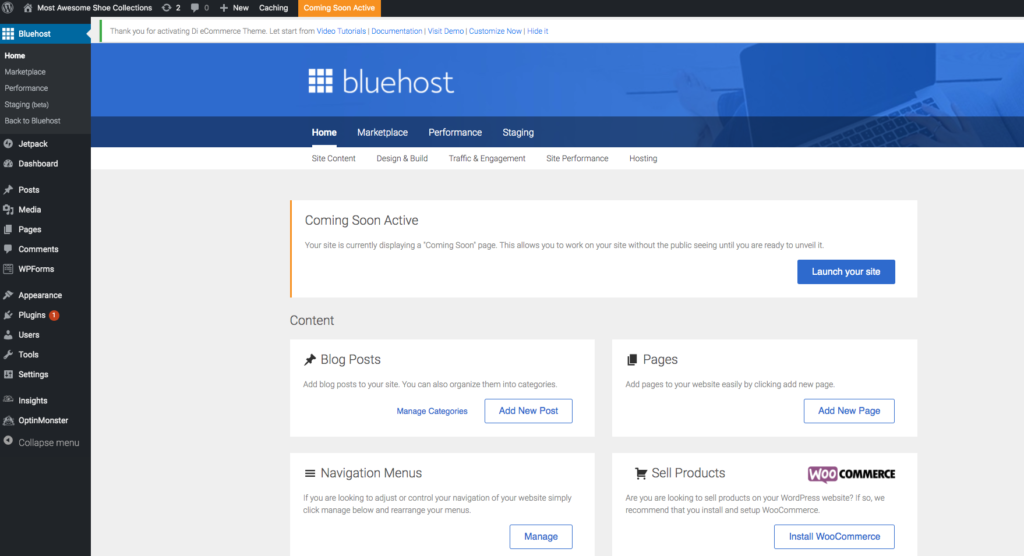
Step 8: Bonus Blog Plug-ins
Once you are in your WordPress.Org account (which should look like the above image), you will want to go down to the Plug-ins on the left sidebar and then click add new. Next, add the below free plug-ins.
- Yoast: This is for SEO on your blog. It helps guide you in making your website keyword optimized and more!
- Wordfence: This helps give your website extra protection from hackers.
- Shortpixel: This plug-in shrinks your images to help with page load time.
- Updraft: This is a free plugin to backup your website.
- Grow by Mediavine: This plugin is paid, but it will give you all the social media sharing icons and it is totally worth it in my opinion.
The Course that Helped Grow My Travel Blog
I have to admit, WordPress itself can be a little bit of a learning curve. It takes some time, but after messing around with your page for a week or so, you will get the hang of it.
If you are looking to accelerate your blog, I would highly recommend taking the Blogging Fastlane Course designed by one of the top Adventure blogs in the World.
My blogging journey has not been an easy one. I have made countless mistakes within my 2 years of blogging.
From signing up with affiliates too early, having the incorrect permalinks, failing to add “nofollow” to my affiliate links, not incorporating proper SEO and keyword search… and the list goes on and on.
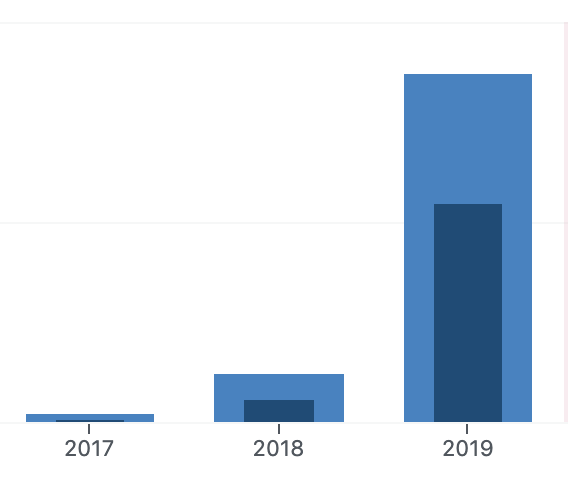
My blogs growth over the years. You can see that in 2019, when I started the course, my traffic changed. I would tell myself that this blogging is only a hobby, so when only my friends and family read my blog, I brushed off getting zero traffic. After over a year, I finally got tired of getting no traffic.
This is when I realized if I wanted to monetize my blog, I would need some expert help. I had read countless other blogs and used freebie courses, and honestly, I got nowhere. This is when I finally invested in the Blogging Fast Lane.
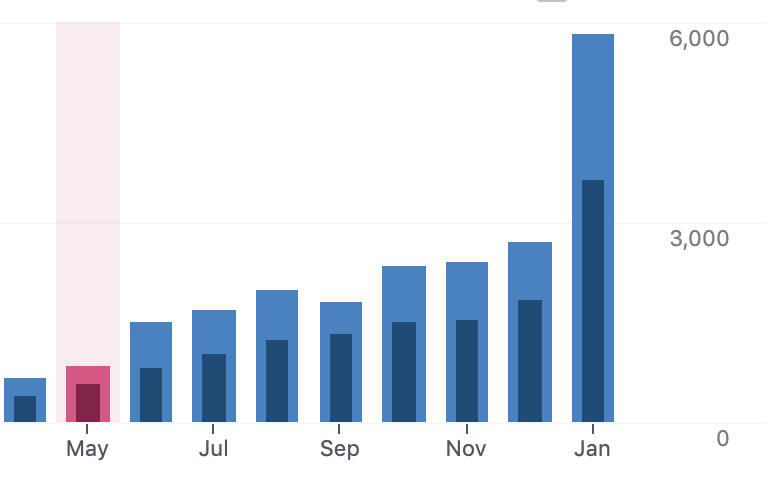
I originally learned about Tom and Anna from a podcast about successful digital nomads. Since starting the course in May of 2019, my traffic has skyrocketed and I have even started making affiliate income. They go through the basics of starting your website and niche selection. Then they deep dive into helping you monetize through smart SEO and affiliate marketing.
If you are serious about blogging and don’t have too much knowledge of SEO, keyword searching, creating backlinks, or affiliate marketing, I would really consider their course.
Looking back to 2017 when I first started, if I had just invested in a course, to begin with, I wouldn’t have to continuously go back and fix old posts with proper SEO and affiliate links.
Even now, in 2021, I still have old posts that I need to fix and even change the link if I want a chance to be on Google’s first page. I am a lifetime member with them and I have found their whole course so beyond helpful!
SEO Tools
If you are somewhat familiar with SEO, my new favorite tool I just invested in is Keysearch. Now, I won’t write an article without first checking Keysearch to see what keywords get the most traffic and if my website has the opportunity to rank for them on Google. With this code “FINDLOVETRAVEL” you can receive 20% off the tool.
An additional tool you can use is Moz. This tool is free but limited to the number of searches you can do. You just have to create an account and then you can search for keywords and even check your Domain Authority (DA).
Starting out your DA will likely be 1. If you are not familiar with DA, this number basically determines how likely you are to rank on Google. It starts from 1-100. One thing that determines DA, is how old your blog is. This is why it’s important to make your website live even if you have 1 post.
Start Getting Traffic Quick to Your Travel Blog
Since you are a new blog, getting traffic from Google will be tough at first. Therefore, the best way to start getting people on your blog is through Pinterest!
For each blog post you write, make sure to add Verticle images with text overlay at the bottom of each post (see below). These are the images you will upload to Pinterest.
Still Feel Overwhelmed Starting a Travel Blog
If you still feel overwhelmed and would rather have someone do it for you, I totally get that! With years of experience building WordPress websites, I am able to set you up for success. Getting your website up and running with your hosting, domain name, and plugins to get you started.
To inquire about having a blog set up for you, please email me at hello@findloveandtravel.com with the subject line – Build WordPress site. I also do one on one sessions helping you get oriented with using WordPress, SEO, Pinterest, and more!
How To Start a Travel Blog Wrap-up
I hope you found this post to be helpful in starting your blogging journey! I wish you tons of success! I know there is a lot of information in here, but just take it step by step! You got this!
Did you find this guide on How to Start a Travel Blog helpful? I’d appreciate it if you could share it below!
This was a great article spelling everything out for someone looking to start a blog. I can back all your steps up <3
Thank you so much, Lauren! I’m glad to know I got everything covered!